Google XML Sitemapsの設定方法!【WordPressプラグイン】
Google XML Sitemapsって何?
設定方法も知りたい!
この様な疑問にお応えします。
この記事を読むことによってGoogle XML Sitemapsがどんなプラグインか、設定方法はどの様に行うべきかが分かる様になります。
設定方法はとても簡単なので、サクッと終わらせましょう。
Google XML Sitemapsとは
Google XML Sitemapsは、ブログの更新情報をGoogleに正しく伝える役目があります。
このサイトマップの送信が無いと検索結果に全く反映されないという訳ではないのですが、場合によっては何日も反映されないなんてことも。
というのもGoogleの検索結果は、検索エンジンのクローラー(巡回ロボット)によって認識されているからです。
クローラーが認識してないうちは、検索結果に表示されません。
しかし、このプラグインを使えば、いち早く最新の状態を伝える手助けができるというわけです。
 HISA
HISA「サイトを更新したよ」というアピール!
設定も簡単なので、是非参考にしてみて下さい。
Google XML Sitemapsをインストールする

さっそく、Google XML Sitemapsのインストール(追加)をしていきましょう。
WordPressの管理画面から「プラグイン」→「新規追加」をクリックし、空欄に「Google XML Sitemaps」と入力。
「今すぐインストール」→「有効化」のクリックでOKです。
プラグインの追加方法がわからない場合は、以下の記事を参考にしてみてください。
次は、Google XML Sitemapsの設定をしていきましょう。
Google XML Sitemapsを設定する
WordPressの管理画面から「設定」→「XML-Sitemap」をクリックします。
これから設定する項目は以下の通り。
- 基本的な設定
- Additional pages(追加ページ)
- 投稿の優先順位
- Sitemap コンテンツ
- Excluded Items(除外項目)
- Change Frequencies(頻度の更新)
- 優先順位の設定(priority)
設定は、ほとんどチェックの選択なのですぐに終わります。
基本的な設定
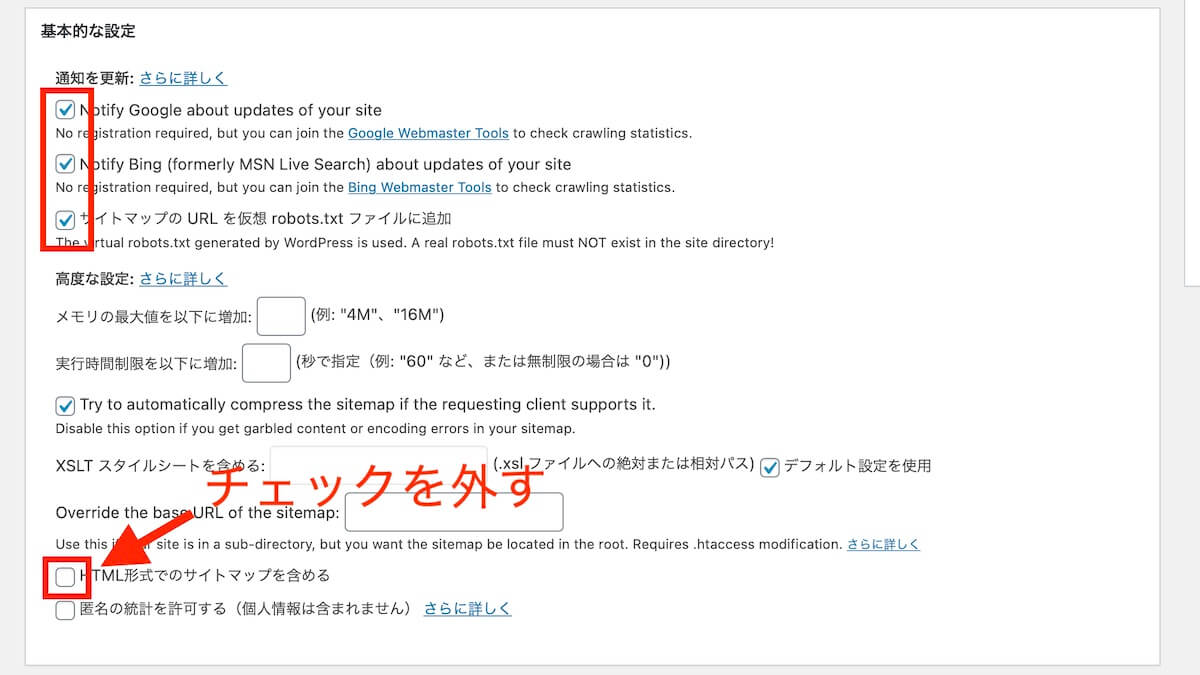
上の3つにはチェックをいれておきましょう。
3つのチェック項目の意味
- サイトを更新したらGoogleに知らせます
- サイトを更新したらBingに知らせます
- サイトマップの場所を検索エンジンに正確に伝える
これらはすべて重要なのでチェック推奨です。
「HTML形式でのサイトマップを含める」は、サーチコンソールでエラーになることが多いので外しておくことをおすすめします。
あとはそのままで構いません。
Additional pages(追加ページ)
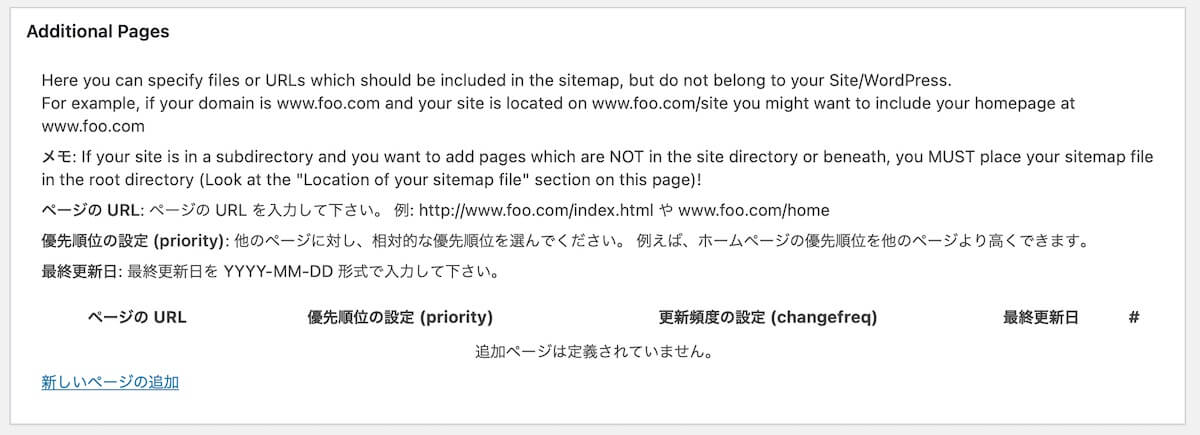
手動でサイトマップを追加できる項目ですが、ここは何もしなくてOKです。
投稿の優先順位
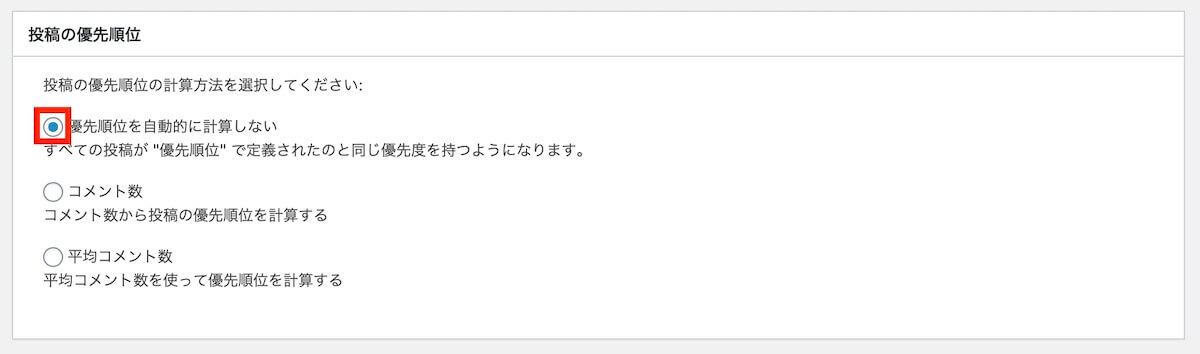
投稿の優先順位は「優先順位を自動的に計算しない」にチェックを入れましょう。
優先順位は後の設定で決めていきます。
Sitemap コンテンツ
サイトマップに載せる内容を設定していきます。
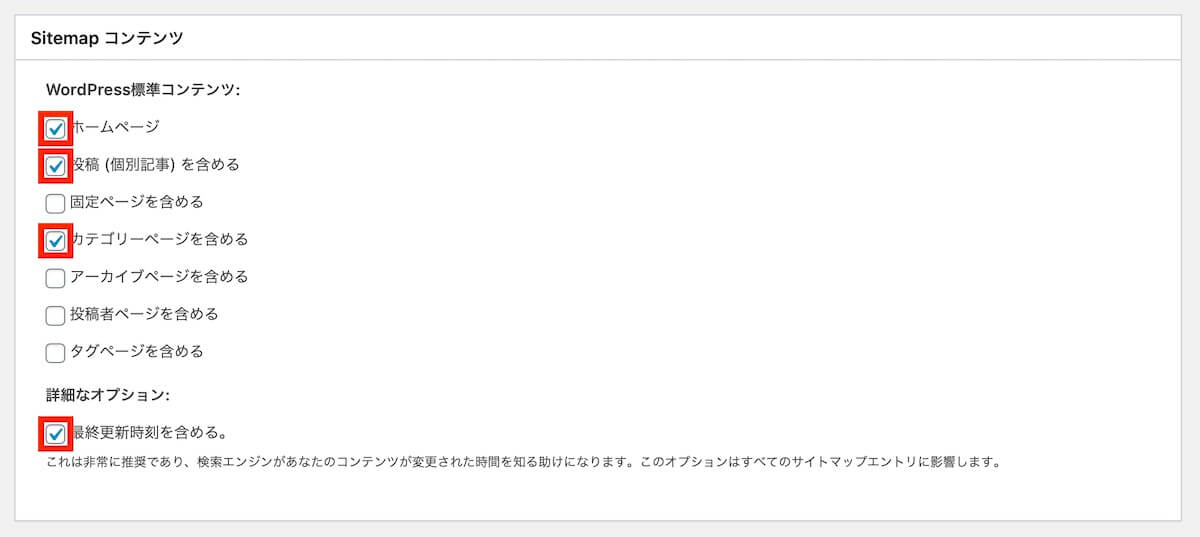
チェックを入れるのは以下の4つです。
- ホームページ
- 投稿(個別記事)を含める
- カテゴリーページを含める
- 最終更新時刻を含める
コンテンツに関わる重要なページだけをサイトマップに掲載することで、不要なページを検索エンジンが見に行かない様に最適化ができます。
固定ページやアーカイブページ、投稿者ページなどはSEO対策にほぼ影響しないので外しておいて問題ありません。
Excluded Items(除外項目)
Excluded Items(除外項目)は、サイトマップに掲載したくないカテゴリー、投稿、固定ページを指定できます。
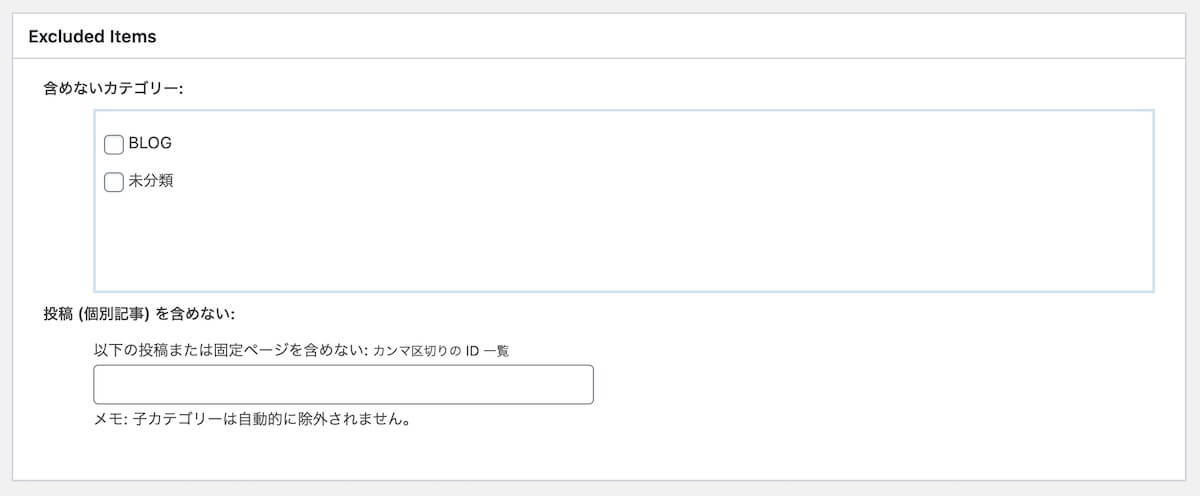
基本的に何もしなくてもいいですが、もし検索キーワードを意識していないお知らせページやカテゴリーなどがある場合はチェックを入れてもOK。
検索順位に悪影響(あまり検索されない様な内容)を除外しておくことで、アクセスUPに繋がる可能性があるからです。
個別ページを除外する場合
個別記事を除外する場合は、IDを入力する必要があります。
IDは、投稿記事のタイトルにカーソルを合わせることで確認することが出来ます。
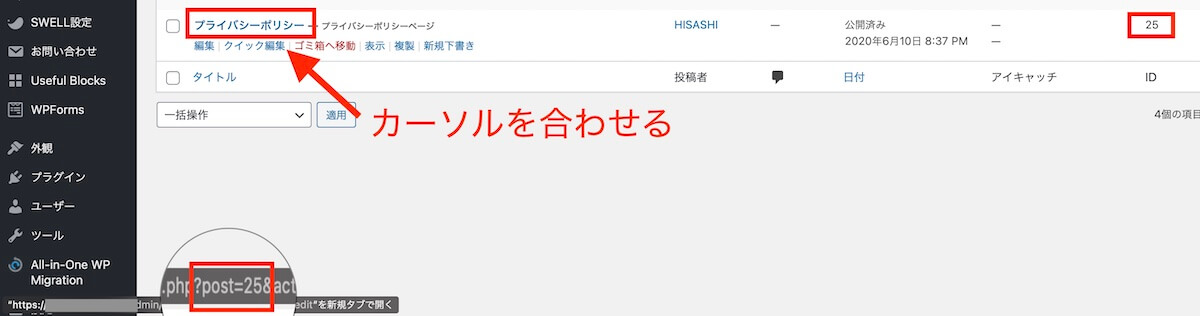
ブラウザ下のステータスバー(URL)にある「post=〇〇」の数字がID。
有料テーマ「SWELL」では、あらかじめ右側にもIDが表示されています。
Change Frequencies(頻度の変更)
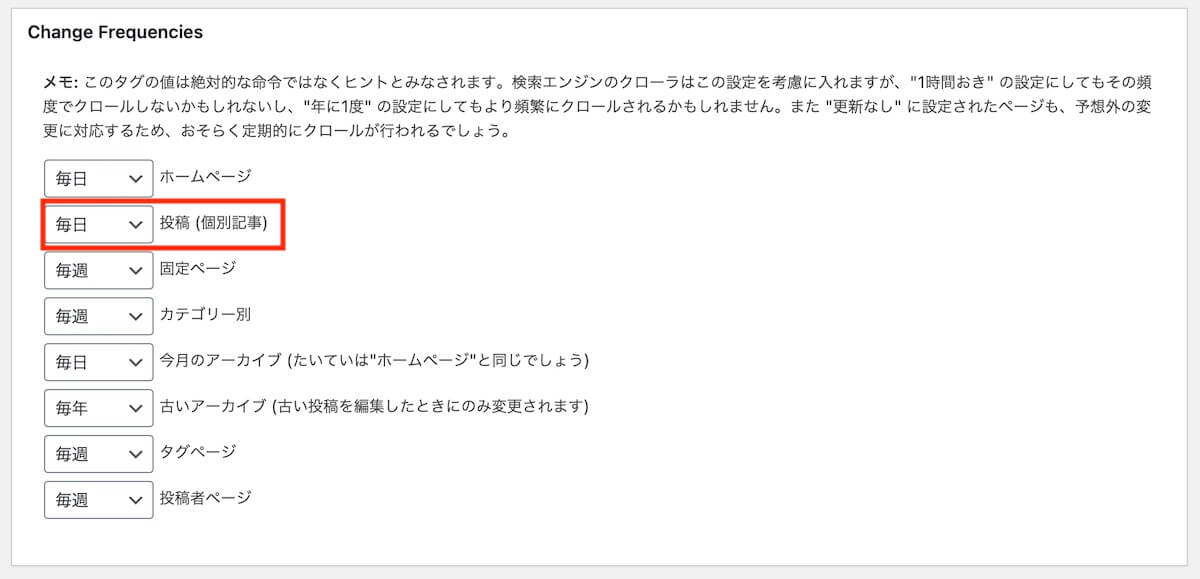
検索エンジンに知らせる頻度を設定していきましょう。
「毎日」のように頻度が早いほど、「重要なページ」だと認識してもらいやすくなります。
ブログサイトなら、「投稿(個別記事)」の更新頻度が高いはずなので「毎日」にすることをおすすめします。
おすすめの設定
- 毎日:ホームページ
- 毎日:投稿(個別記事)
- 毎週:固定ページ
- 毎週:カテゴリー別
- 毎日:今月のアーカイブ
- 毎年:古いアーカイブ
- 毎週:タグページ
- 毎週:投稿者ページ
ただし、あくまでも「絶対的な命令」ではないので目安ととらえておきましょう。
優先順位の設定(Priority)
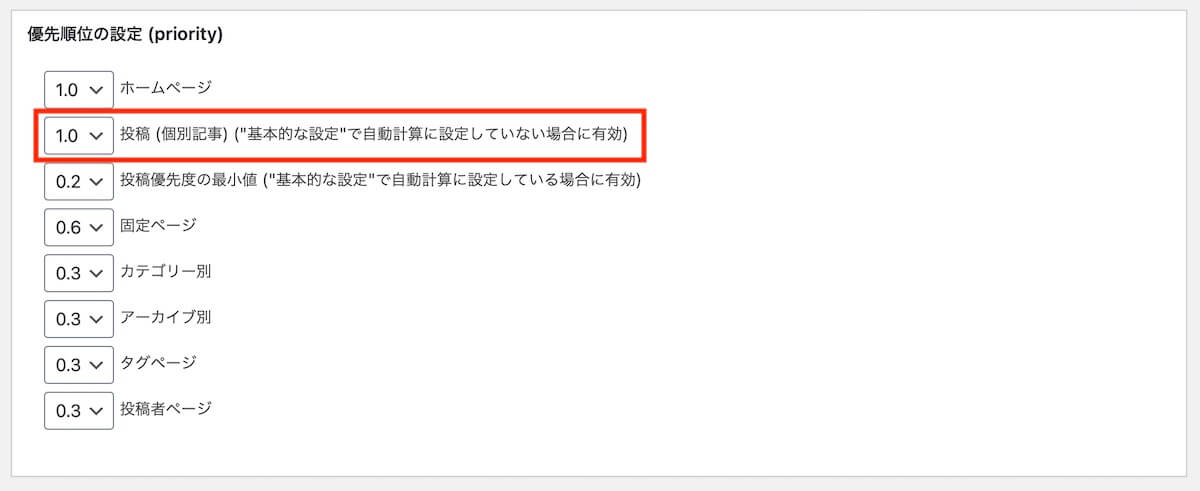
優先順位の設定では、どこのページを優先してクロールするかを設定できます。
数値は「1.0(優先度大)〜0.0(優先度小)」までの11段階。
ブログサイトは個別記事の投稿がメインなため、「投稿(個別記事)」を「1.0」にしておきましょう。
おすすめの設定
- 1.0:ホームページ
- 1.0:投稿(個別記事)
- 0.2:投稿優先度の最小値
- 0.6:固定ページ
- 0.3:カテゴリー別
- 0.3:アーカイブ別
- 0.3:タグページ
- 0.3:投稿者ページ
優先したい箇所は必要に応じて変更してください。
最後に「設定を更新」をクリックして完了です。
Googleサーチコンソールでサイトマップを追加する

先ほど設定した内容をGoogleに認識してもらうために、Googleサーチコンソールでサイトマップを追加します。
この設定で全て完了になります。
HISAとても簡単!
もしまだ、Googleサーチコンソールの設定ができていない人は、以下の記事から登録を済ませて下さい。

サイトマップの追加方法
まずGoogleサーチコンソールにログインして下さい。
画面左にある「サイトマップ」をクリックします。
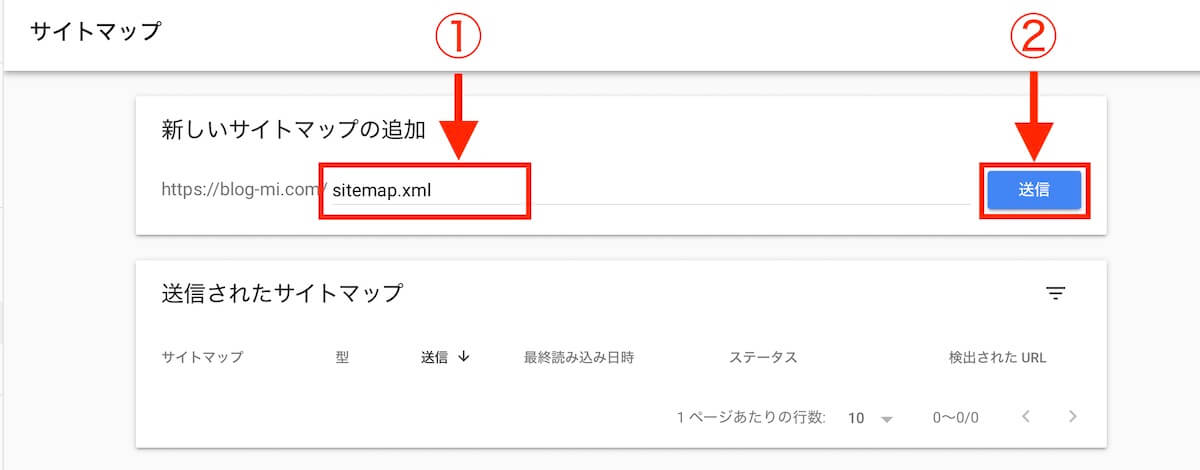
- 「sitemap.xml」と入力
- 「送信」をクリック
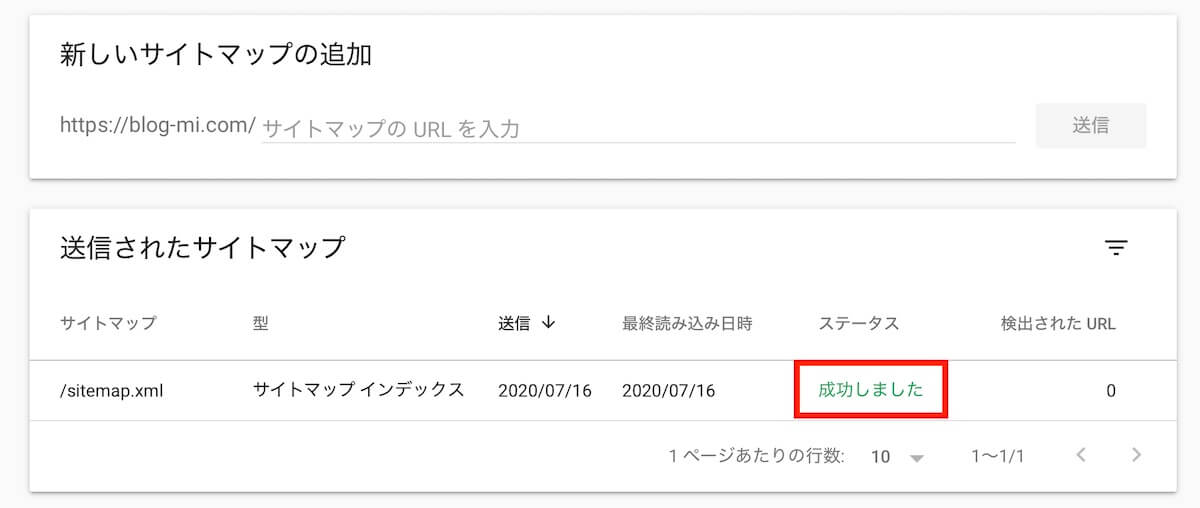
「サイトマップを送信しました」と表示されたら「OK」をクリックしてください。
以下のように「成功しました」と出たら設定完了です。
 HISA
HISAこれで全部完了です。
お疲れ様でした!
まとめ:Google XML Sitemapsの設定方法

この記事の内容をまとめます。
記事の内容
- Google XML Sitemapsとは?
- Google XML Sitemapsを設定する
- Googleサーチコンソールでサイトマップを追加する
以上の順番で解説してきました。
Google XML Sitemapsを使えば、より正確にすばやくサイトの状態を最新に保つことができます。
結果的に、読者も集まりやすくなります。
新しい記事を更新した場合や、アクセスアップのためにも是非設定しておきましょう。
以下の他のおすすめプラグインをまとめています。
お気軽にコメントどうぞ